Description
Stop hand-painting terrain layers.
Terraforge Auto-Landscape assigns ground materials automatically: sand at the shoreline, dirt
and grass through the midlands, stone and snow up top — with cliff rock appearing wherever the
surface gets too steep to hold anything else. You set a start height and a blend range per
layer; the material does the rest, on any mesh, in any world.
It is triplanar, so it needs no UV mapping at all. That makes it work directly on
Marching Cubes voxel terrain, sculpted meshes and procedurally generated surfaces — the cases
where conventional landscape materials simply cannot be applied.
### Automatic by height
Each layer gets a Start Height and a Blend Range. Layers accumulate as elevation rises
and cross-fade through the range you give them, so transitions are soft instead of banded.
### Automatic by slope
Height alone makes terrain look striped. Two independent slope rules break that up:
- A moderate-slope rule that exposes dirt where grass could not cling
- A steep-slope rule that exposes cliff rock on near-vertical faces
Each has its own start angle, falloff range and strength. Every layer additionally carries a
Slope Response value, so you decide which layers slope affects and which resist it — snow
can slide off a cliff face while rock stays put. Slope noise (amount and scale) breaks the
contour lines up so the result never reads as a clean mathematical band.
### Use your own textures
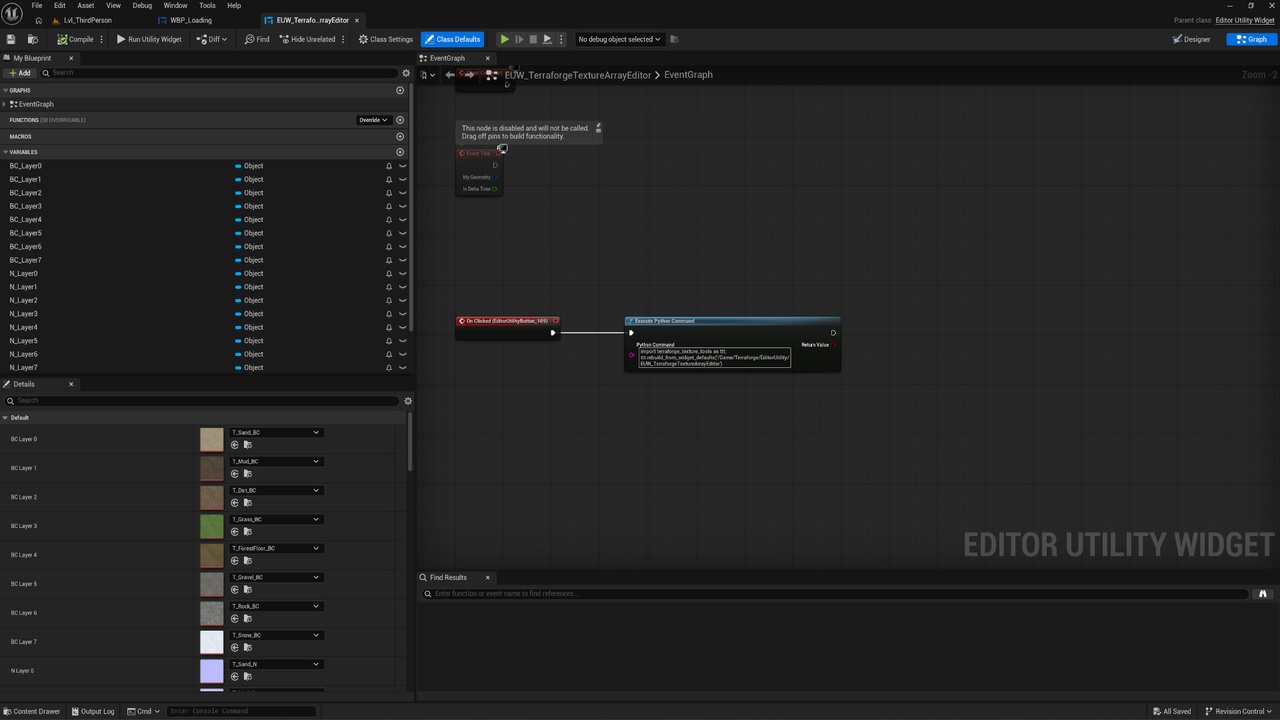
The ten included layers are a starting point, not the product. An editor utility widget lets
you load your own ground textures into the layer arrays from inside the editor — no reimporting,
no rebuilding the material, no touching the graph. Point it at your art and the material picks
it up.
That matters more than it sounds. Texture arrays are awkward to edit by hand: the slice order is
the layer order, every slice has to agree on resolution and format, and rebuilding an array the
obvious way silently breaks every material that referenced it. The tool exists so you never have
to think about any of that.
So the layers are yours to choose. Swap the included grass for your project's grass. Replace all
ten. Build a Martian palette. The height and slope logic does not care what the textures are.
### Twelve texture samples, whatever you do
Layers are stored in texture arrays, not as separate texture parameters. The material
samples only the two layers actually present at a given pixel and interpolates between them —
so the shader cost is 12 samples flat (two slices, three triplanar axes, base colour and
normal) whether you use three layers or ten. Adding a layer costs you nothing at runtime.
### Full artistic control
- Per-layer Tint and Tiling — regrade any layer without touching the textures
- Base Tint across the whole terrain
- Normal Strength, Roughness, Specular and Metallic
- Slope Roughness Boost — let cliff faces read wetter or drier than flat ground
- Triplanar Sharpness — control how tightly the three projections blend
- Debug Slope View — a heat-map mode showing exactly where each slope rule is firing, so
you can tune angles by looking instead of guessing
### Ten ground layers to start from
Sand, Dry Sand, Dirt, Grass, Stones, Rock, Snow, Mud, Forest Floor and Cliff — each supplied as
base colour, normal, roughness, ambient occlusion and height at 2048×2048, all seamlessly
tiling. Base colour and normal come pre-assembled into ready-to-use texture arrays; roughness,
AO and height ship alongside for your own use.
All ten are procedurally generated and completely licence-free — no third-party scan data,
no attribution, no redistribution restrictions. Ship them as they are, or treat them as
placeholders until your own art is ready.